For those who missed the first episode , I am setting up a self-hosted web server under Ubuntu 12.04 LTS in order to have control over my data, and no longer depend on third-party publishers. After starting my server, the first big step is the installation and configuration of ownCloud.
Installing ownCloud Server on Ubuntu
Installing ownCloud couldn’t be simpler and is described in the documentation at this address . To put it simply, an addition of url in the list of repositories, an apt-get update/install and voila. Once you have filled in the few necessary and standard information (database, login, etc.), it is already ready to work.
Afterwards, the idea of an ownCloud is to open it outside the local network to take full advantage of its possibilities (file exchanges with friends, family, use of the Android or iPhone client, etc.). In this case, it is advisable to switch to HTTPS for security reasons in order to prevent too much information from circulating in clear text. For once it’s a bit more complex and not necessarily within everyone’s reach, but it’s still doable with tutorials to auto-generate your certificate and create a VirtualHost that works well for port 443.
I lightened the VirtualHost on my side (for more details on virtual hosts see the article on this blog dedicated to VirtualHost ) and changed the paths of the certificates which did not correspond to mine compared to these two tutorials.
I also encountered a problem. When I logged into ownCloud, I had the header with the logo. But in the area including the login form I had a red “not found”. After taking a look at the apache logs, it turns out that I had incorrectly indicated the path of my DocumentRoot in the VirtualHost (if this ever happens to you, you will know where to look).
Installing ownCloud Clients
That’s it for the server, now let’s move on to the clients. You can find the different versions on this page .
I first installed the Windows client on a Windows 7. Installation is simple and quick. Then you just need to configure the client with your https url. As well as a login/password couple that you will have configured on your server.
By default, the client syncs a folder to you. But you can sync others easily. All you have to do in the configuration is to choose a local folder, give it an alias and choose the remote path to be synchronized on the following screen.
I also tested the Android client. Not all expected functions are available yet. For now it’s just a matter of synchronizing the files, not yet the contacts or the calendar which would also be useful. But let the product mature further. If necessary, ownCloud uses the calDAV and cardDAV standards, you have applications to manage these formats. On file management, it’s still quite basic, but it’s functional. One of the significant features is to be able to automatically send the photos taken by your smartphone device to ownCloud after each shot.
On the other hand, I had a problem with an installation of the Windows client on XP. Installation and setup went well. But the synchronization does not work and displays an error message “Csync could not find the file specified”. I saw on some forums that I was not the only one in this case, the problem is being solved apparently. Case to follow.
NB: I found the cause of the problem above. Sharing a folder with a user (see next paragraph) creates a “Shared” folder for him in which the shared folder(s) are located. This means that the remote path is no longer “Family” for example, but “Shared/Famille”. Beginner’s problem
Sharing files and folders with ownCloud
One of the reasons that made me install ownCloud is to be able to share and synchronize files with family and friends.
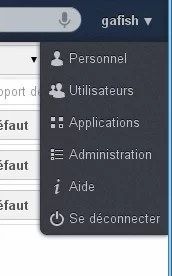 The first step is to declare user accounts. To do this, go to the menu at the top right (with your login) and in the drop-down menu that opens select users.
In the top bar, you will see two input boxes: “Connection name” and “Password”. Enter these two pieces of information, and validate with the “Create” button. A line will then be added to the list of users.
You can then define at this time whether or not this user belongs to the admin group, as well as his possible storage limit.
Your user account created, you will now be able to share folders with it. To do this, return to the list of folders. By passing your cursor over the line of a folder, you will see appear at the end of the line, before the size and the date of modification, buttons allowing to rename, download and share as in the example below :
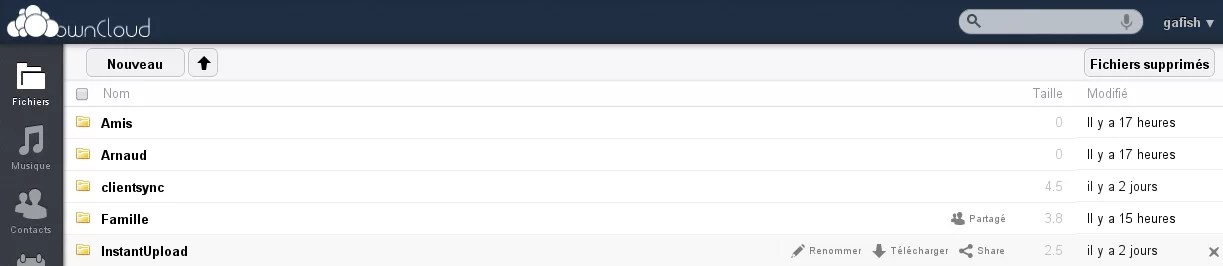
By clicking on sharing, you will be able to enter the first letters of the account with which you want to share the folder to see a list of corresponding users. This user can then synchronize this folder for example with one of his local folders via the synchronization client. Note that you must connect at least once to the ownCloud web interface with the account in question before the first synchronization. And in relation to my concern in the previous paragraph, note that a “Shared” folder will be created for the user with whom you share a folder. In this Shared folder will be the folders that other users have shared with him. To be integrated in the remote tree structure in the case of synchronization.
For having done some tests, it works quite well and quite quickly. Files added locally appear on ownCloud and vice versa. For now, I don’t have much perspective yet on intensive use of the beast. I will probably update this article a little later when I have more flight hours on ownCloud.
Feel free to share your feedback with us through comments.


