As part of my posts on self-hosting, after having installed a private cloud to exchange photos with my family, and installed a music streaming service to have access to my music from anywhere, I launched a few weeks ago in home automation with Jeedom, I suggest you do a little overview on the subject with a little hindsight. If you want to get started in home automation, but have never dared to take the plunge, this article is for you.
The choice of protocol
One of the first points that comes up when you want to set up home automation at home is the choice of protocol. The two main ones are RFXCom and Z-Wave (but they are not the only ones). Each has its advantages and disadvantages. ZWave for example uses a mesh technique where all ZWave elements participate in signal meshing for better reliability (with a response acknowledgment system). On the other hand, where an RFXCom module can turn around twenty euros for the first prices, it is rare to have a ZWave module at less than 60 euros. The RFXCom is compatible with different modules. Like Oregon Scientific or Somfy RTS sensors (but not with IO HomeControl also used by Somfy and Velux). The advantage is that the protocols are not incompatible.
The choice will therefore be made according to the needs you have for your home automation installation. For my part, I went with RFXCom for the moment, with two radio sockets to control lights, a door opening sensor and a remote control. All in order to be able to do the first tests, and play with Jeedom and the scenarios. We will come back to this a little later in this post.
Installing Jeedom
The installation of Jeedom is quite simple. You will find all the details depending on your configuration (on a Raspberry, on a NAS, on a Linux system, etc.) by following this link . On my side I installed it on my Debian server. Note that by default Jeedom runs on Nginx, you can if you wish install it on Apache. For my part, I left it on Nginx, which means that it runs on a port other than port 80 (used by my Apache).
First steps
plugins
After installation and basic configuration, one of the first things you will do is to look for plugins in the Jeedom market (in the “General” menu, “Plugin”). You will already need the plugin that corresponds to your protocol to be able to connect your different modules afterwards.
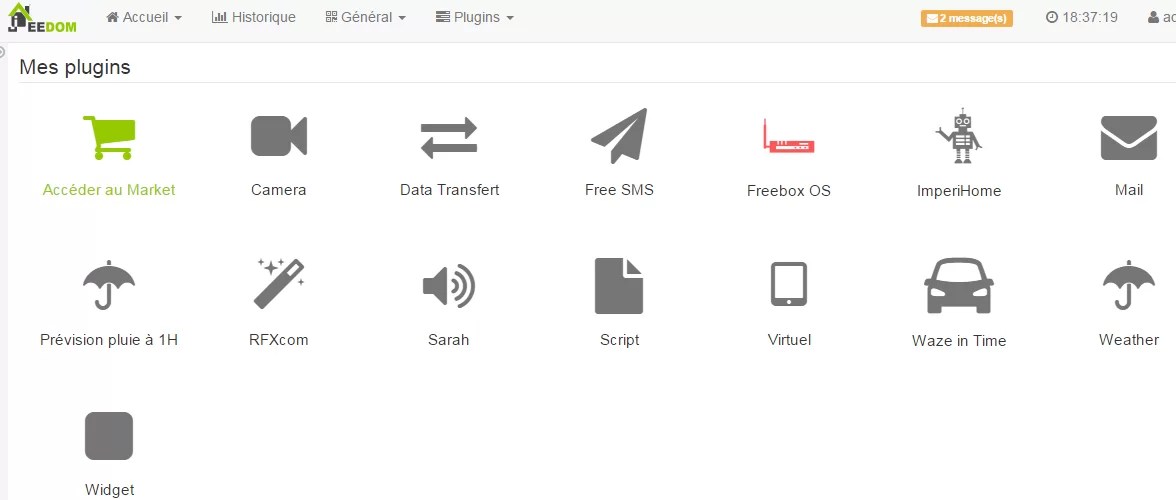
Here are a few plugins that could be useful to you (non-exhaustive list of course, there are many, some of which are related to specific hardware):
- Weather: you will be able to retrieve with this plugin weather information corresponding to your city via the web. You can then use these values in scenarios for example (send me an sms in case of strong wind, start watering if the weather is dry…)
- Mail: will allow Jeedom to send emails. Convenient to be notified of special events.
- Free SMS: if you are at Free Mobile, Jeedom will be able to send you SMS via the Free Mobile API (without needing to put a 3g card in Jeedom).
- Imperihome: makes it possible to bridge Jeedom and Imperihome (mobile applications).
- Virtual: will allow you to create virtual modules in Jeedom, for example a virtual switch which has the effect of turning on all the lights on a floor.
- Waze in time: retrieves travel time information via Waze, convenient for Jeedom to send us an SMS if the travel time is longer than expected, for example.
- Camera: Allows you to manage IP cameras.
- Alarm: allows you to manage alarms and security.
- Heating: allows you to have control over heating management.
- SARAH: allows you to manage interactions with the SARAH software to control all of this by voice.
- … and all many others that I let you discover.
Note that not all plugins are free, and that there are official plugins (created and now by the Jeedom team) and unofficial plugins (created and maintained by Internet users, so may be less aligned with the core jeedom).
Objects
For organizational purposes, you will be able to create objects (“General” menu, “Objects”) in Jeedom. These are virtual and allow you to create equipment pools. In general, objects will schematize your home. For example, you will be able to create a “Ground floor” object, and then create for example a “Dining room” object which will depend on the “Ground floor”.
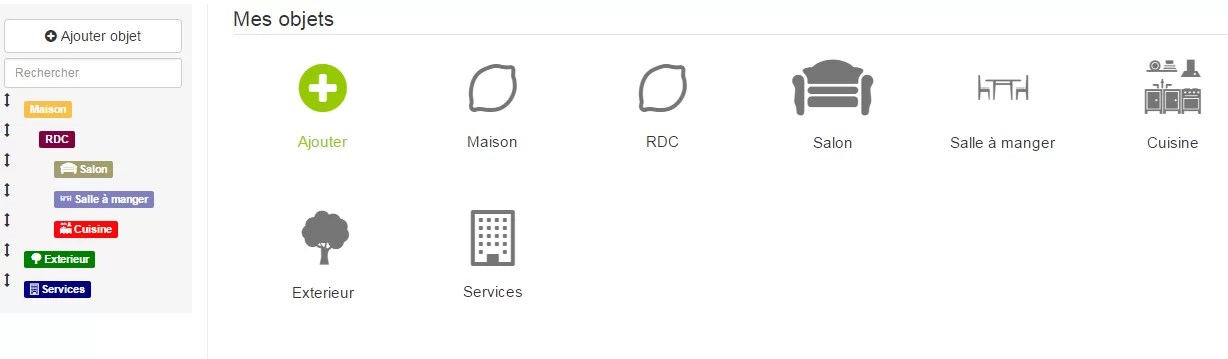
You will then be able to assign your equipment and your scenarios to these objects.
Equipment
You can now connect your equipment. To do this, you must go to the plugin corresponding to your protocol. You will have the list of equipment already connected and an add button. The easiest way is even to activate the automatic creation of equipment in the administration of the plugins.
For others, it will not be enough. For example, to add a DIO socket, you must first create the equipment (before connecting it) via the “Add” (+) button, choose from the list of DIO sockets, activate it and save everything. You will then see the automatic creation at the bottom of the equipment of the commands, in particular “on” and “off”. You can then plug in the socket, and while the diode is flashing (usually within 5s of plugging in), you will need to click on the “Test” button opposite the on command. Your socket is then paired with Jeedom. It will be the same principle with the sockets.

You can then go into the details of a piece of equipment to configure the different possible actions, the expected values, the link with the object, whether or not to activate it…

Scenarios
It is the heart and the interest of the system. For the moment, you only have objects and equipment that can receive or create information, with the scenarios you will be able to bring intelligence to all of this. The scenarios are found in the “General” menu, “Scenarios”.

You will be able to assign them to objects, and group them. When you create a scenario, you will have the choice between a simple mode and an advanced mode. The mode I will describe is the advanced mode.
By entering a scenario, you will be able, like the equipment, to assign them to an object as a classification. An important point of the scenario is the launch mode, either provoked (by an event, such as pressing a button or triggering a sensor) or programmed (by a regular launch in cron). Several other parameters are available in the header of a scenario as in this example:

You will then define what the scenario will do precisely, and for this you will be able to add blocks, via the dedicated button:
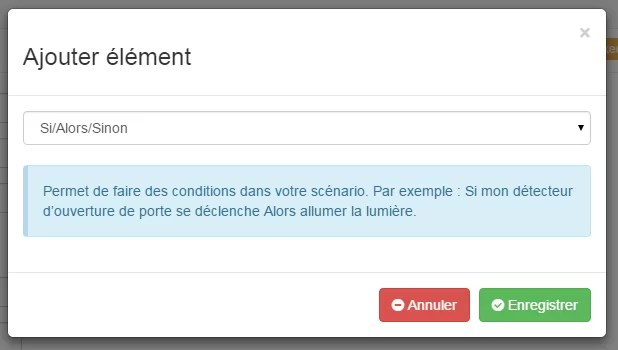
It is possible to add action blocks, conditional blocks (if…then…else), loops… In short, enough to do something quite advanced. Especially since you will be able to nest these different blocks. It is also possible to have scenarios that call other scenarios.
Let’s take the simple example of a remote control with which we want to have a button controlling a light. We are going to create a conditional block, if the button sends the lighting information we turn on the light, otherwise we turn it off:
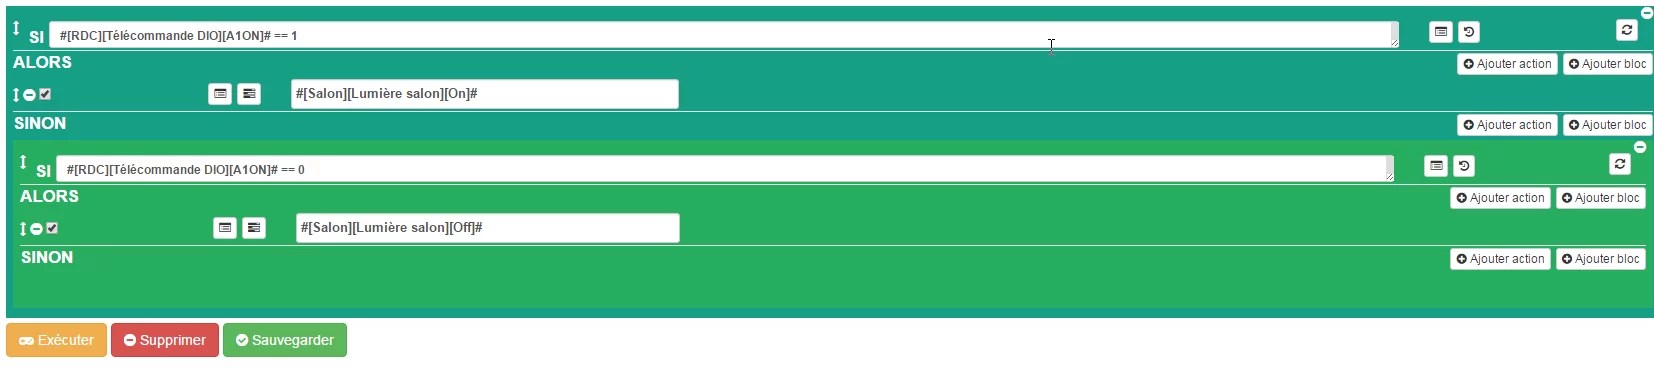
In the block, you have buttons allowing you to search for commands. Not much to enter in this block, you just have to choose the right equipment with the expected values through dialog boxes like this:

At this point, you measure the usefulness of the objects and the correct assignment of your equipment and scenarios to your objects. Because the bigger your installation, the more complicated it will become to find your little ones if you don’t have a good organization from the start.
We can also see that by mixing physical equipment (sensors, sockets, sockets, etc.) with virtual equipment (information retrieved by plugins, sending emails, sms) you will be able to create very complete scenarios. Some examples of possible ideas:
- A sensor lets you see that I’m coming home. With the information retrieved by Weather, I know that the sun has set. In this case, I turn on a light.
- When I’m not at home, I turn on the lights during the evening to simulate a presence. If a door opening sensor is activated, I am notified by SMS and the camera receives the order to record for 30s.
- The Waze plugin collects travel times to my work. If ever the journey time is higher than normal, I am notified by SMS to leave a little earlier.
- …
As you can see, the ideas are endless and depend above all on what you expect from your installation.
Possible problems
Loss of RFXCOM
I put it here, even if it is unlikely that you will come across the same problem that I encountered, because it took me a while to solve this problem. I reinstalled my system, and once my Debian reinstalled, my Jeedom installed and reassembled with the backup, none of my RFXCOM commands worked. The RFXCOM daemon was starting (although it seemed complicated, the auto mode no longer worked), the logs looked correct (I was trying to light a socket, I could clearly see the request passing) but nothing was happening, my light bulb remained hopelessly extinguished.
While examining the system messages when I plug and unplug my RFXCOM transmitter on the USB port via the dmesg command, I came across the following message:
usbfs: interface 0 claimed by ftdi_sio while 'brltty' sets config #1
It would therefore seem that my usb port was monopolized by this brltty package (which apparently makes it possible to manage braille keyboards). And suddenly my transmitter could not take over. Uninstalling this package (apt-get remove brltty) solved my problem.
502 Bad Gateway
I have sometimes encountered this problem, especially when updating my system (migration from Debian Wheezy to Jessie for example). This is often due to PHP modules to be reinstalled or re-configured correctly (in particular php-fpm and php-cgi).
Error on send request to jeedom request got an unexpected keyword argument json
I encountered this problem following a Jeedom update. My scenarios continued to work, but impossible for example to add an RFXCom object in inclusion mode. I was then on Debian Wheezy. Upgrading to Debian Jessie solved my problem. It was probably due to packages that were too old on Wheezy, but I couldn’t identify which ones (maybe the version of PHP, but I had still been able to upgrade to 5.6 on Wheezy).
Resources
Here is a first overview of Jeedom. It is not exhaustive, because there are many aspects that I have not covered (administration, dashboard, creation of views, link with ImperiHome, interactions…). But it should allow you to get started if you want to get started in home automation with Jeedom.
Some links to go further:
Official site
Documentation
Youtube channel (on the other hand since the first tutorials, some interface or organizational elements have changed).
